Debug Guide #
Introduction #
Arm Keil MDK (Microcontroller Development Kit) provides robust debugging capabilities that are essential for efficient software development targeting Arm Cortex-M based microcontrollers. This document provides instructions on using the debugging features in Keil.
Debug Step: #
Enter debugging and run to main funtion #
Enter debug mode, run program from flash to main function.
- Open project, double click “proj_ble_lp.uvmpw” in “SDK\in-dev\proj\proj_ble_find_my\build\mdk”.
- Click project option button, select “J-Link” in “Debug” page.
- Check the “Load Application at Startup” and “Run to main()” option.
- Click “…” button, select script “jlink_flash_setup.ini” in “SDK\in-dev\proj\proj_ble_find_my\build\mdk”.
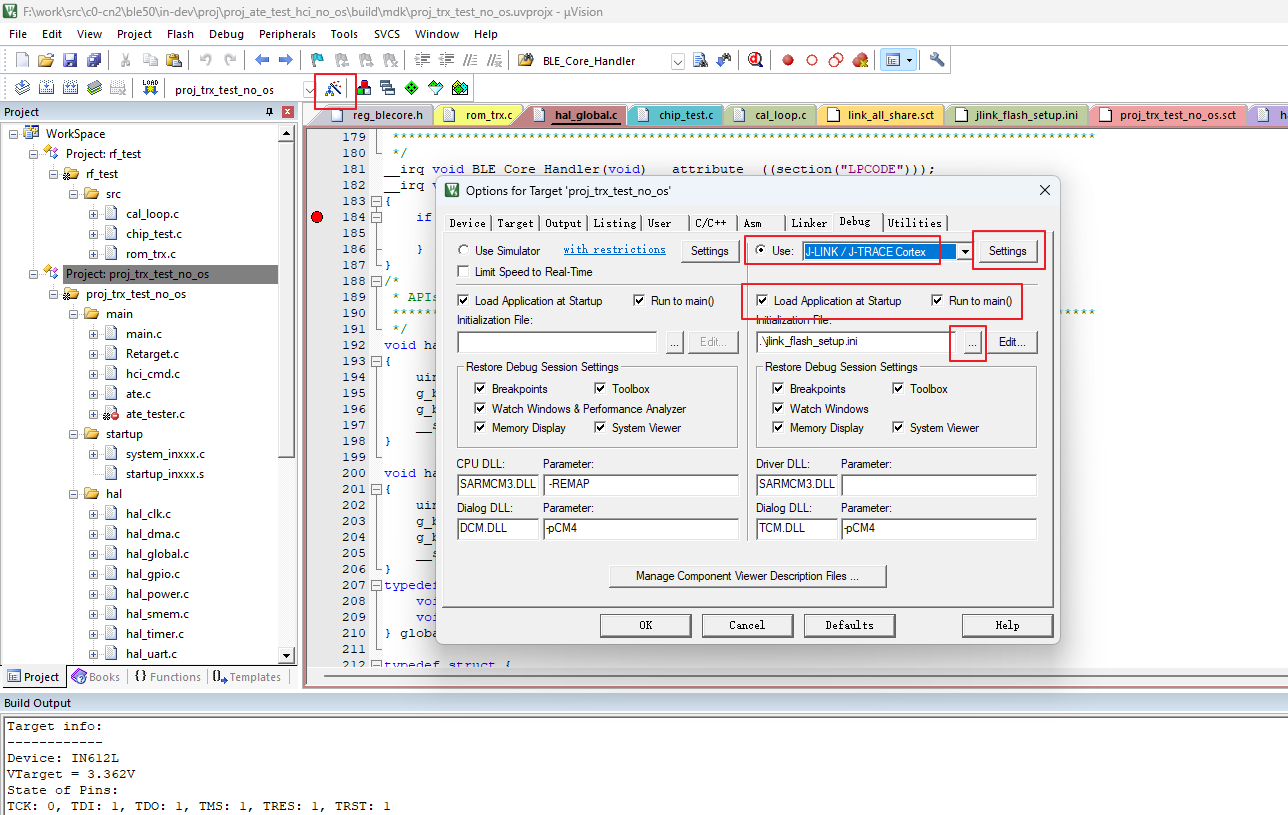
- Click “Setting” button, select “SW” (single-wire interface) from the drop-down menu of “Port.” Then click “OK” to apply changes.

Note:
If the J-Link is connected to the DK board and DK board is powered up, KEIL should detect DK board and display its information in the “SW Device” column, as illustrated below. If Keil can’t find device, reset DK and click “Scan” to rescan device.
If a devices selection window pops up, select the “unspecified Cortex M4”.
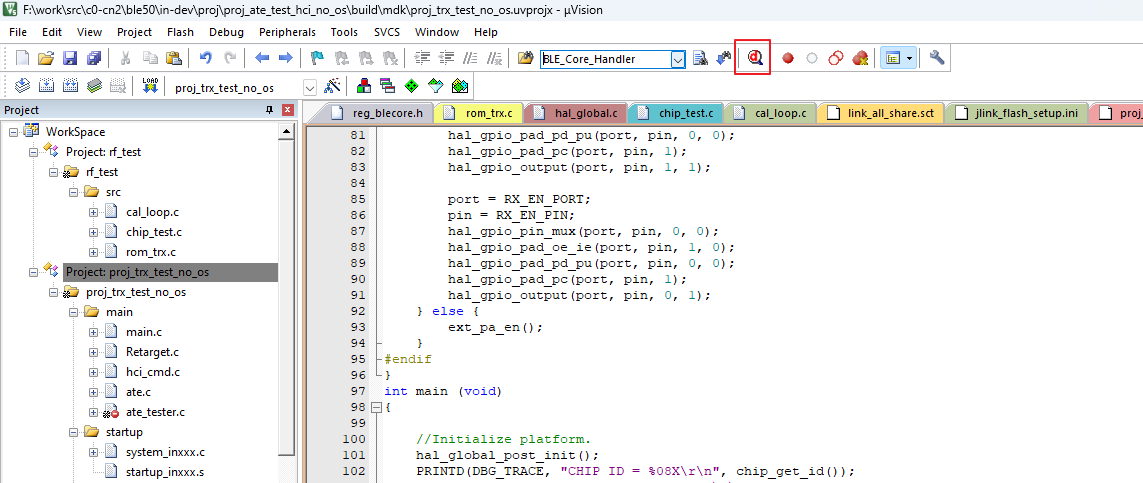
- Click “start debug” button to start debug session.
Entering debugging while the program is running #
When the program is running, enter debug mode, then halt the CPU at the current instruction.
- Click “Setting” button, uncheck “Reset afger Connect”, “Verify code Download” and “Download to Flash” option.
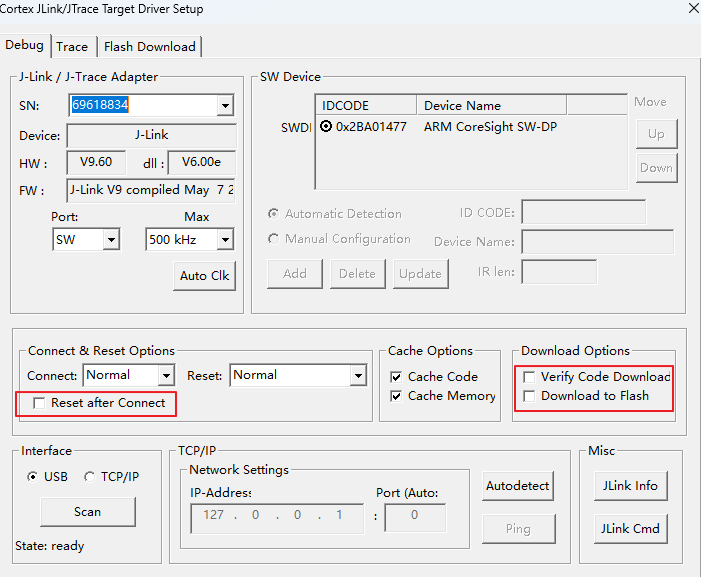
- Click “OK” button.
- Uncheck the “Load Application at Startup” option.
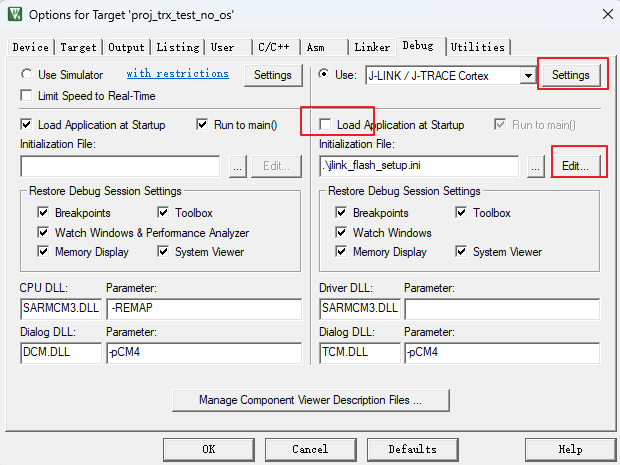
- Click “Edit” button, commit out this line “Setup_giga();”
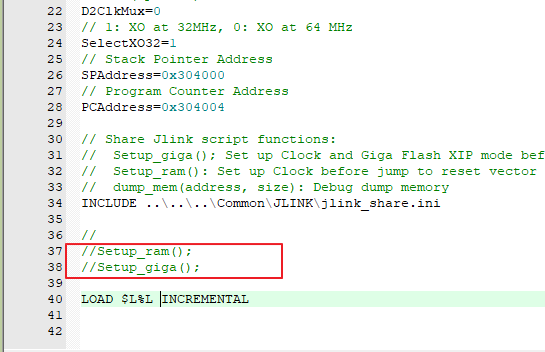
- Click “OK” button.
- Click “start debug” button to start debug session.