Quick Start Guide #
Introduction #
This document provides a guide as following:
- Install development tools
- Use the configuration tool
- Build “proj_ble_find_my” demo project
- Download image to DK
Preparation #
- InPlay DK Board
- JLink Debugger
- InPlay SDK
- Usb cable.
Install Tools #
Download and install MDK-ARM Keil µVision (Version 5.21 or later is recommended).
Download and install J-Link Software and Documentation Pack(Version 7.62 or later is recommended).
Install InPlayInc.DeviceFamilyPack. Double click the InPlayInc.DeviceFamilyPack installation package under the directory of “in-dev\tools”, or download InPlayInc.DeviceFamilyPack from website.
Generate configuration File (optional) #
Demo projects are in “SDK/in-dev/proj”. Each project has a configuration file named “in_config.h”. This file is located in the “inc” directory of the project. This file is genareted by “InPlay SwiftConfig Tool”. If you want to modify the default configuration file, use this tool that is located in “in-dev/tools/in_config”.
- Run InPlay SwiftConfig Tool.
- Click “Open” button, open the configuration file in “in-dev/proj/ble/proj_ble_find_my/inc/in_config.h”.
- Modify project configuration.
- Click “Save” button, save the configuration file to “in-dev/proj/ble/proj_ble_find_my/inc/in_config.h”
Build the Project #
- Open the Keil project, double click file “in-dev/proj/ble/proj_ble_find_my/build/mdk/proj_ble_lp.uvmpw”. “*.uvprojx” is Keil single project file, and “*.uvmpw” is Keil multi project file. Here we use multi project file.
Noted: If you encounter errors indicating that project files such as “hw_ana” and “ble_flash” cannot be found, please ignore them. These projects are library project. And SDK inlcudes prebuild library files.
- Click “Batch Build” button. Select all projects and click “Rebuild.”
Download to DK board #
Connect JLink debugger to DK board. And power up DK board.
Click “Project” menu in Keil, and select “Options for target”(or use shortcut key Alt+F7).
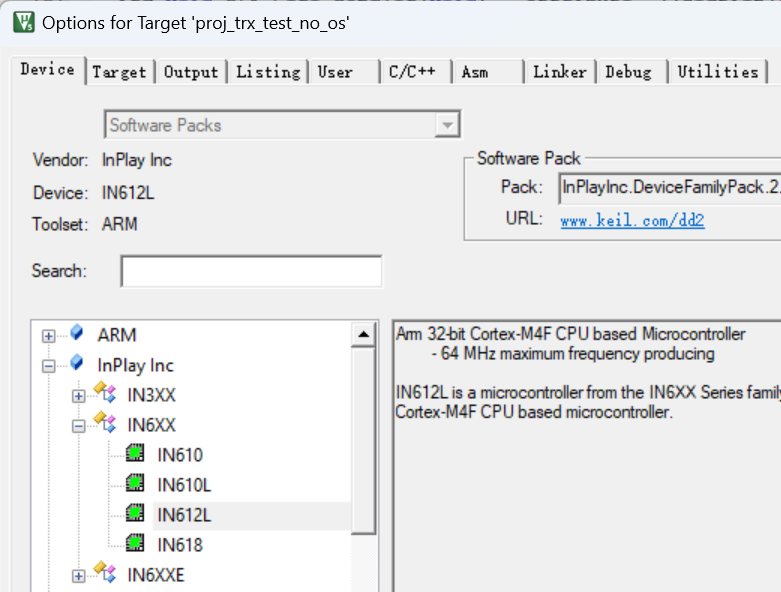
Click “Device” tab, and select “IN612L” device under “InPlay Inc”.

Note: If chip is “IN610-Q32-R-G8C0I”(1MB Flash), select “IN610_G8C0I” device.
- Click “Debug” tab, and select “J-Link” from the drop-down menu, as shown below:

- If a devices selection window pops up, select the “unspecified Cortex M4”.

- Then click “Settings” tab, select “SW” (single-wire interface) from the drop-down menu of “Port.” The click “OK” to apply changes.
Note:
If the J-Link is connected to the DK board and DK board is powered up, KEIL should detect DK board and display its information in the “SW Device” column, as illustrated below. If Keil can’t find device, reset DK and click “Scan” to rescan device.

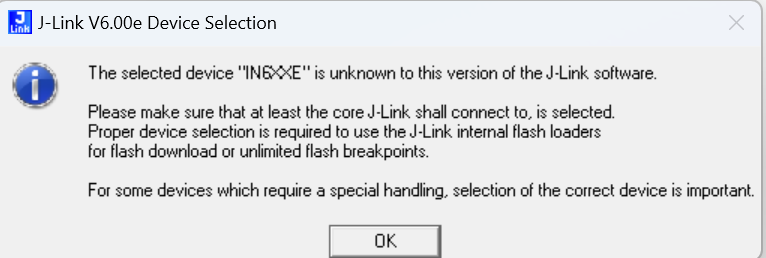
If Keil displays the following warning dialog, please click the OK button and then select Cortex-M4 on the next page.


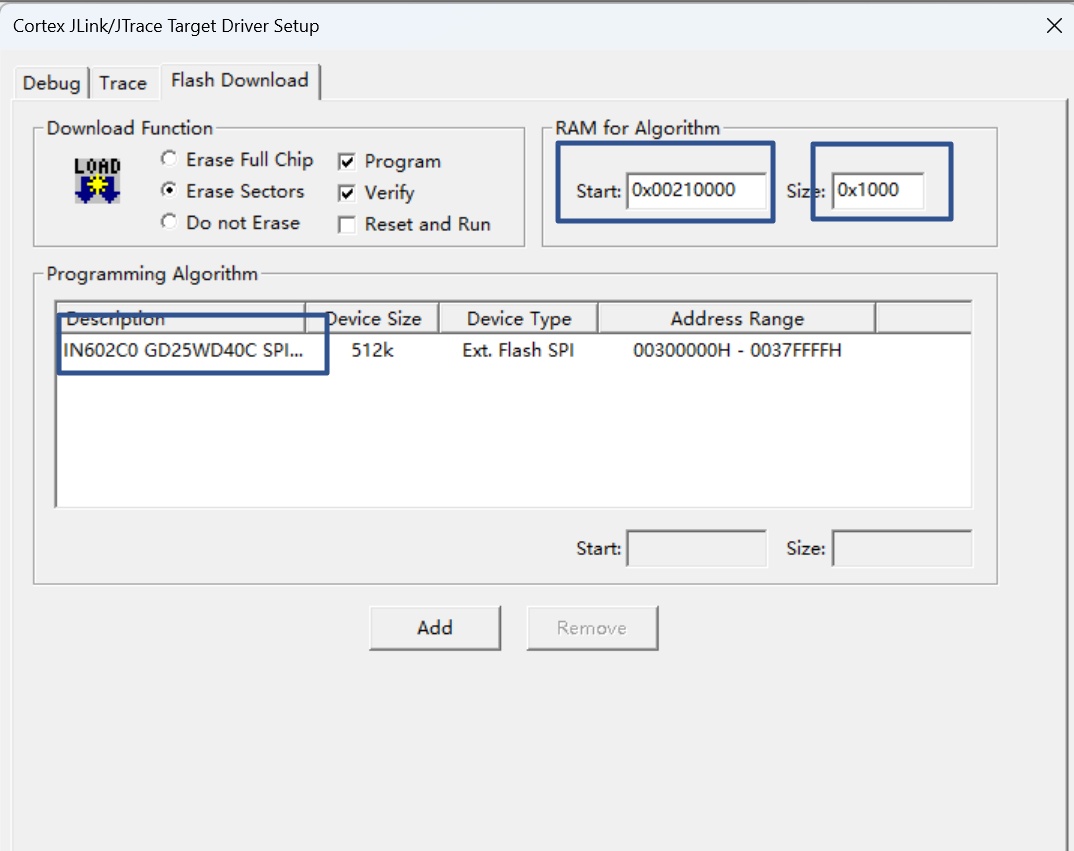
In the “Utilities” tab, click “Settings”. If the Keil Pack is installed, configuration will be done automatically as follows.
 If Keil is not configured properly, please manually add the “IN602C0 GD25WD40C SPI FLASH “flm file by click “Add” button. Then set start addres to 0x210000 and set size to 0x1000.
Note: If chip is “IN610-Q32-R-G8C0I”(1MB Flash), flm file is “IN602C0 GD25WD80C SPI FLASH”.
Click “OK” to apply changes.
Click “download” button to download image file to DK board.
